1. Home
  2. Knowledge Base
  3. Closed Captioning in Adobe Premiere Pro

Closed Captioning in Adobe Premiere Pro

Adding Closed Captioning to a File

By following these steps you will be able to embed FCC compliant closed captioning into your exported video files.

Please note: Premiere Pro will only embed closed captioning in .MXF files. Any other file type exported from Premiere Pro will not have captioning embedded inside the finished file. You may wish to use our Adobe Premiere MXF preset for best results.

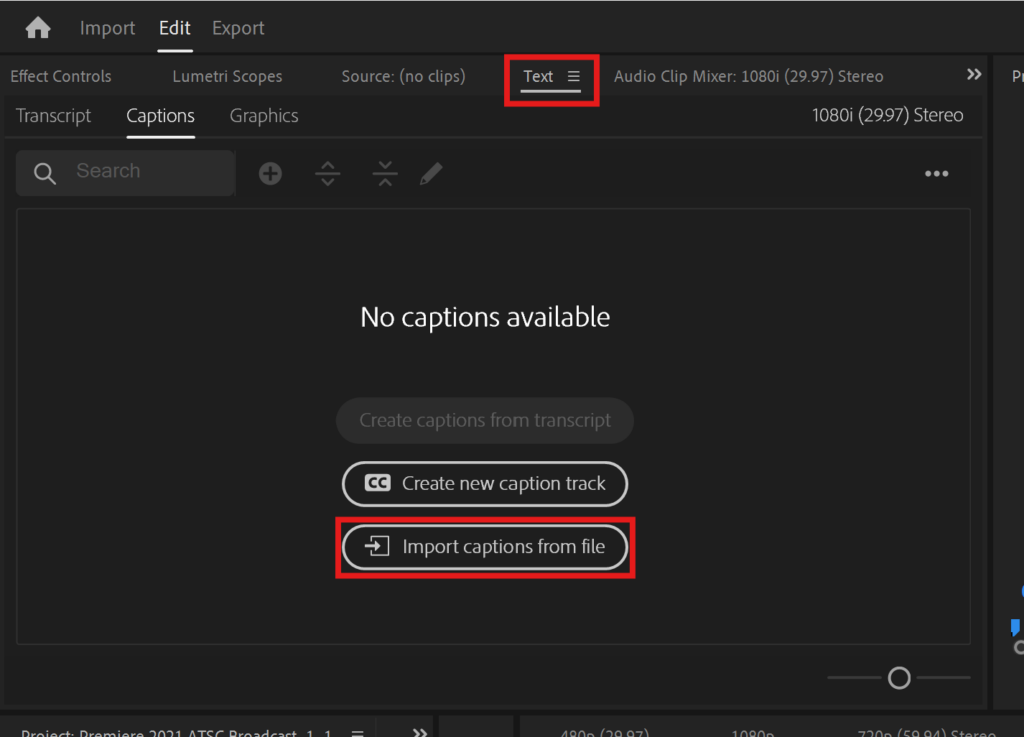
Import the .scc file

Select the .scc file that needs to be embedded into the sequence from within the Text window in your sequence. SRT files can also be imported in this method but please note that .srt may contain too many characters per line and could cause your closed captioning to be “cut off” in some instances.
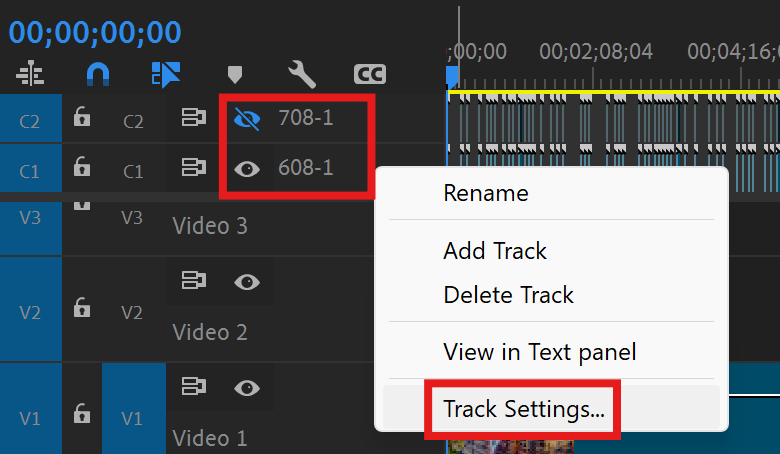
Captioning for broadcast should contain only 32 characters per line. Please be sure your captioning service is adhering to this character limit when creating the caption file or your captions may not show in full during playback.

Within your project sequence click on the text panel and select “Import captions from file”

Check text settings

Once your captions have been imported, you need to change the caption format.

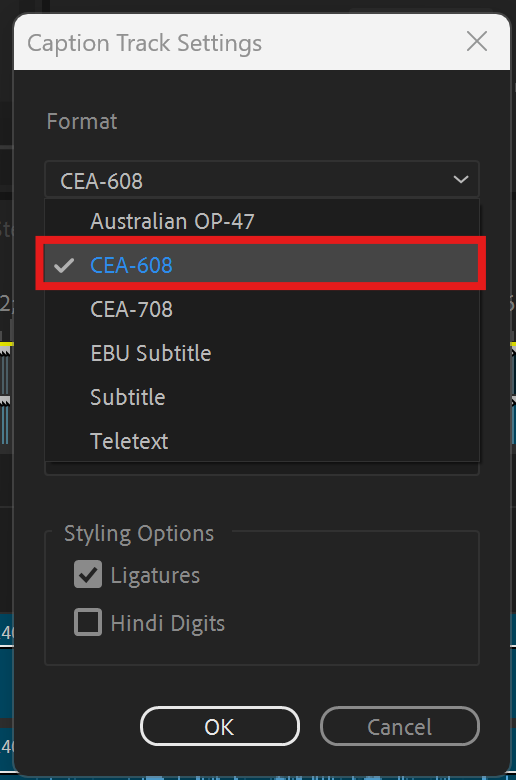
Within the track settings window, change the Format drop-down to CEA-608. This will ensure maximum closed captioning compatibility with all broadcast systems and displays.
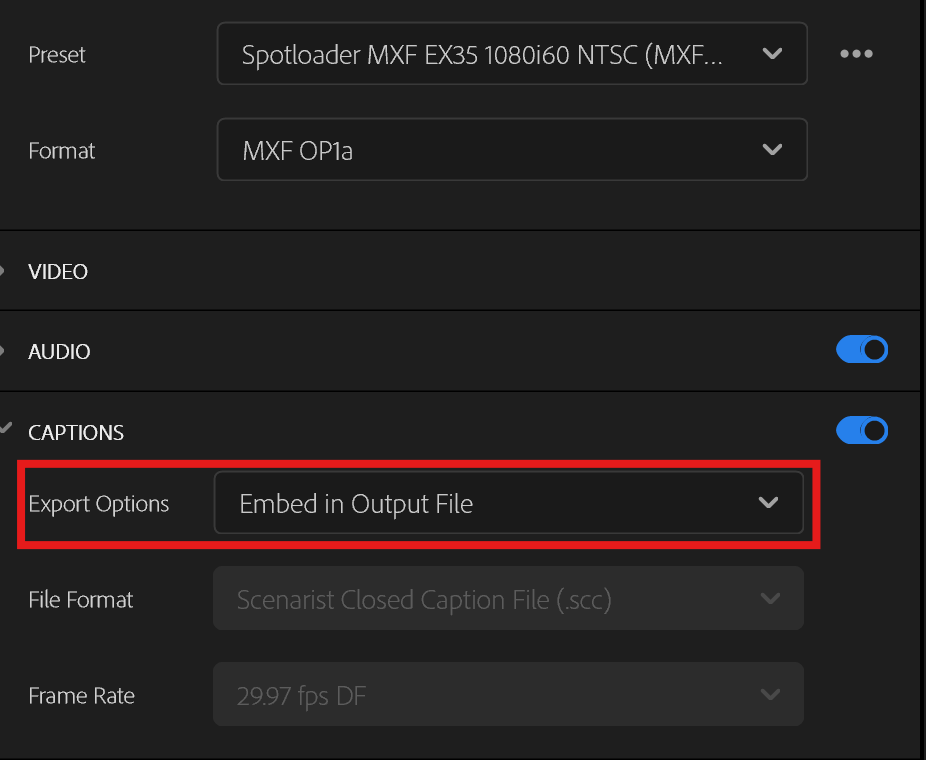
Right click on the caption track in the timeline to access the Track Settings

You can also add CEA-708 captions to your project as well by right-clicking the caption track area and selecting “add new caption track”. Please note that 708 captions should only be in addition to 608 captioning. CEA-608 caption tracks are required.

Export your file

Video files need to be exported as .MXF in order to embed captioning. You may wish to use our preset to ensure your export also meets the file format specifications.

Under the Captions export option select Embed in Output File from the list of drop-down options.

Under “Captions” the export option should be set to “Embed in Output File”.

Do not use the Burn Captions Into Video option. This will permanently add the captioning into your video file with no way to turn it off or on. Burned in captioning is not considered FCC compliant.

Do not use the Create Sidecar File option for your closed captions as this will not attach the captioning to your video file but instead will create a separate text document with the captioning information.

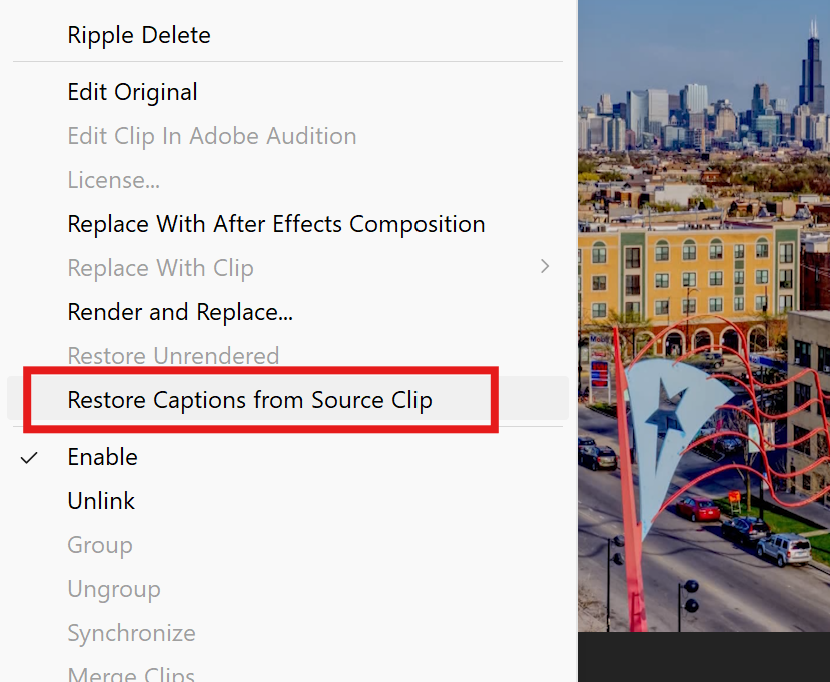
Checking your closed captions after export

Please note that many playback programs such as VLC will not show closed captioning from MXF files. This does not mean the captioning does not exist, just that the program is not capable of displaying the captions.

You can easily check that closed captioning was successfully embedded by opening the exported file into a new Adobe Premiere Pro editing sequence.

After adding the video file to your timeline simply right-click the video and select Restore Captions from Source Clip.

After restoring the captions from source clip you will see the embedded captions from the file.

Once your file has been exported with embedded closed captioning you can upload it to Fig.
Uploading a New Long Form Program to Fig
Uploading a New Short Form File to Fig


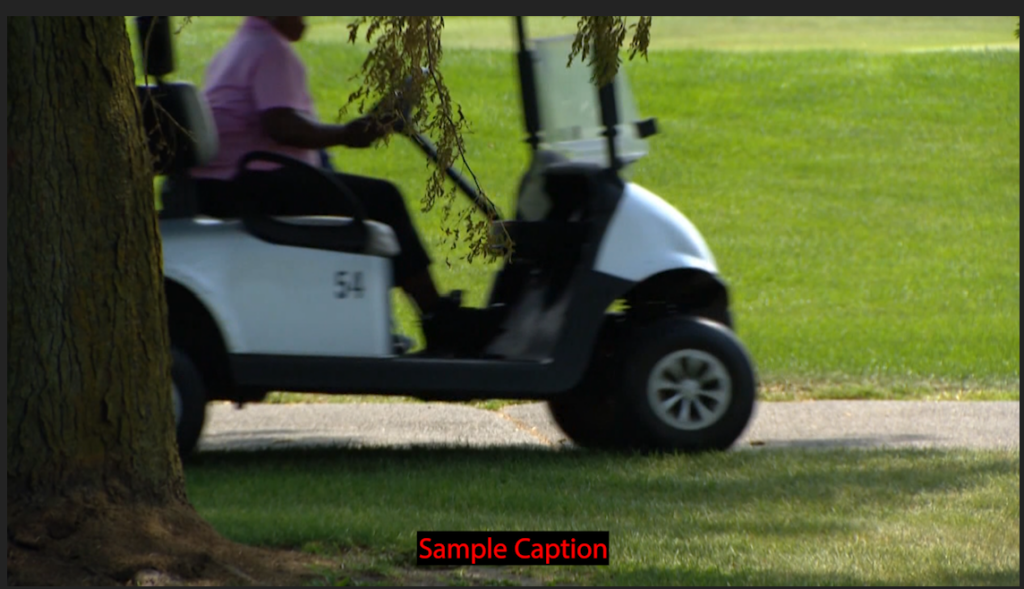
Removing Transparency and Color from Closed Captioning.

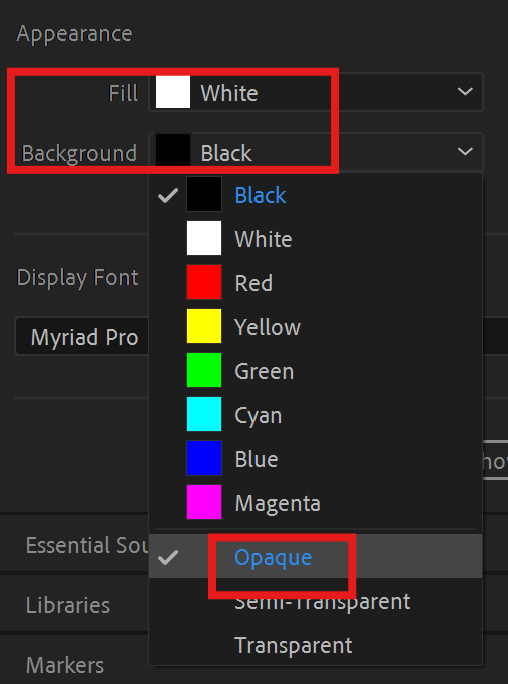
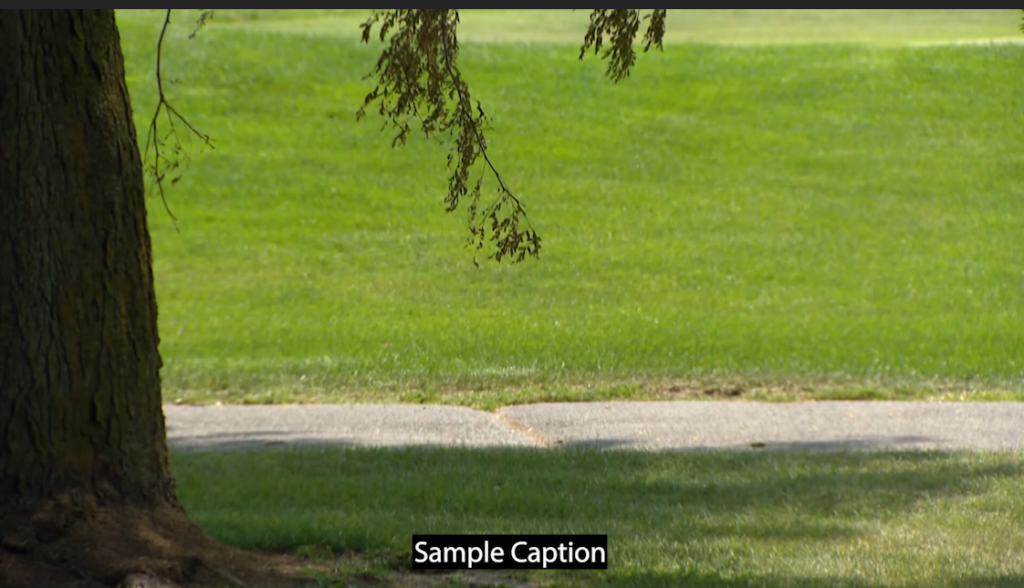
Many broadcast stations require closed captioning to be only white text on an opaque black background. If your captions have colored text or a transparent background these steps will help you address the issue.

caption with a transparent background
caption with non-white text

Open your captioning file in your editing sequence

You can either import your captions from the .scc or .srt file using the text window or by right-clicking on your video with embedded captioning and selecting “Restore Captions from Source Clip”.

Open the Essential Graphics text window

After importing your captions select a text block to access the Essential Graphics editing window.

In the Essential Graphics window you can adjust the properties of your captioning track

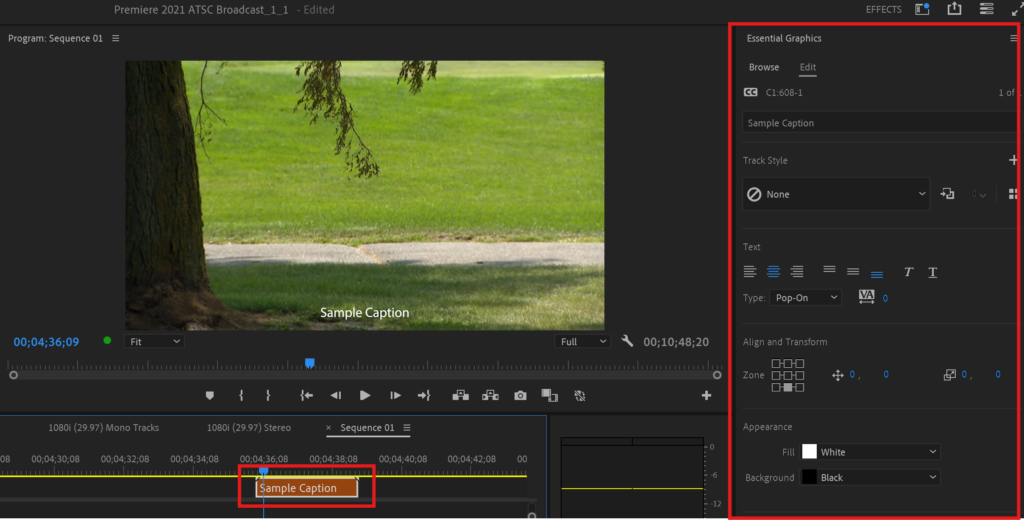
Change the text appearance

In the Essential Graphics window under appearance, change the text fill to white and the background to opaque black.

The background transparency must be set separately from the background color.
The correct caption text and background combination.

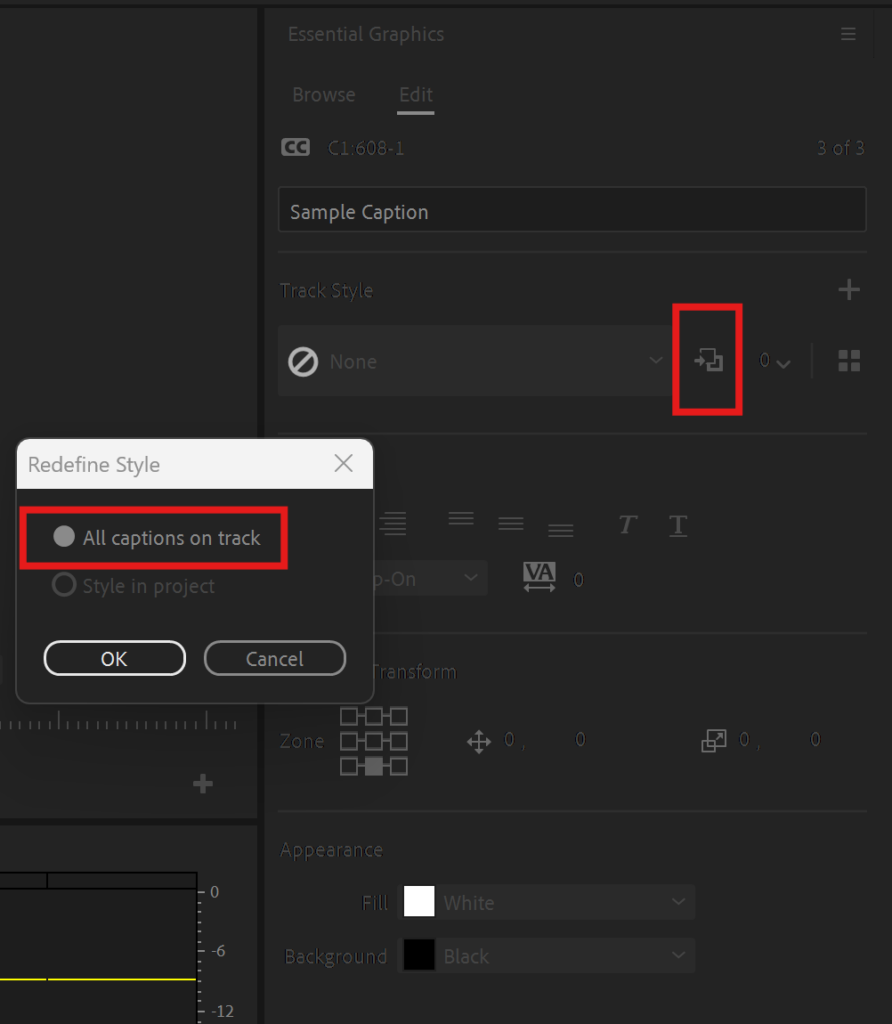
Set the style to all caption blocks

After setting one caption block to the correct settings, click the Redefine Style button and copy the style to all captions in the track.

The Redefine Style button is located next to the Track Style drop-down box in the Essential Graphics window.

Export your file

You can now export your MXF file with embedded closed captions.