

Producing HD Spots
Select Template
This step is optional but can avoid unexpected behavior when exporting to different frame rates or when exporting a non-drop frame sequence as a drop frame output.
- 720p
- 1080i
- 1080p
HD 720-60p (1280×720, 59.94 fps)
HD 720-30p (1280×720, 29.97 fps)
HD 1080-60i (1920×1080, 29.97 fps)
HD 1080-60p (1920×1080, 59.94 fps)
HD 1080-30p (1920×1080, 29.97 fps)
Check Project Properties
If you chose the 1080i template, make sure your Project Projects contain these settings:
Field Order: Upper Field First
Frame Rate: 29.97 fps

Export
If you are exporting a 1080i production, choose these options:
Choose the option HD EX 1920×1080-60i.


Producing SD Spots
Getting Started
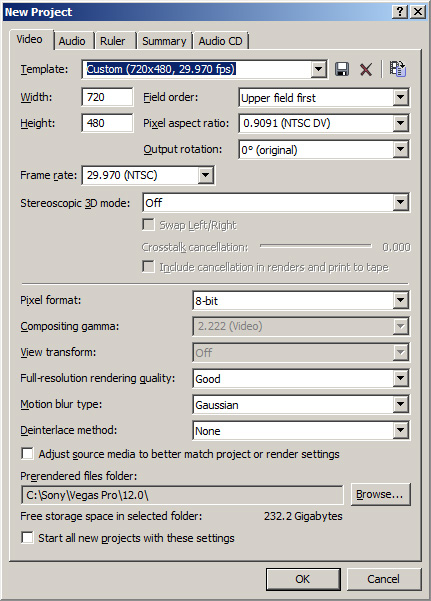
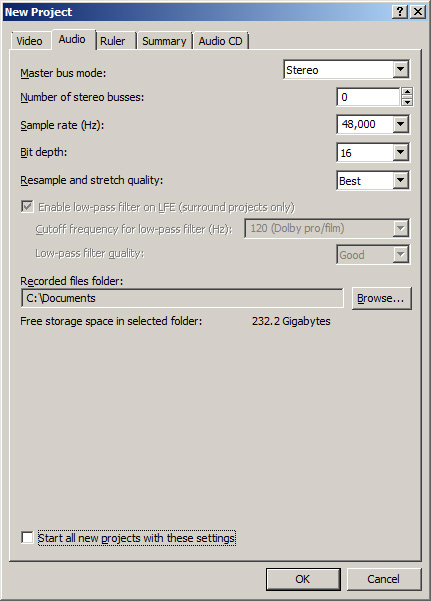
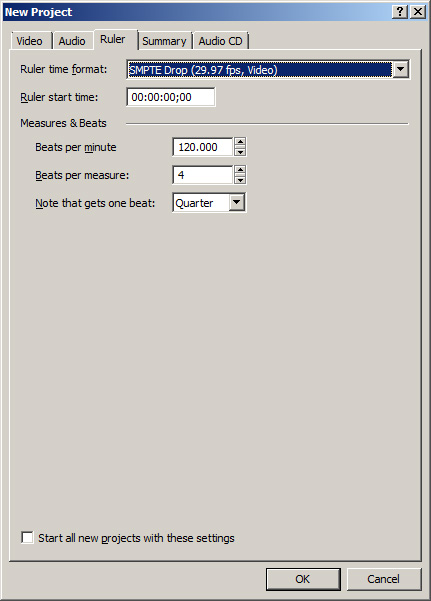
Download a ready-to-go MPEG-2 480i project for Sony Vegas 12. You may also start a brand new project on Sony Vegas 12 by selecting File > New and choosing the following settings:
Edit Your Video
Drag your source clips to the sequence. You may be asked “Do you want to set your project settings to match this media?” Choose “NO”.

Edit your sequence as needed… Follow these guidelines (your commercial should end with at most a single frame of black).
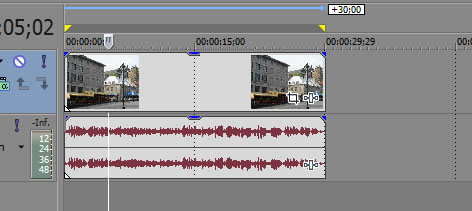
Take advantage of Vegas 12’s action safe and title safe markers in the video preview pane.

Generate the Output File
When you are ready to export your sequence, choose File > Render As.
Create a Reusable Template
The first time you are exporting an MPEG-2 SD Top Field First file, you may want to create a template that can later be used on subsequent SD projects. In the example below, we will create a template called “My MPEG2 480i NTSC CBR”.
Start by selecting a template such as the “MainConcept MPEG-2 / Program Stream NTSC” template. Then, click on “Customize Template” to customize it to your needs.

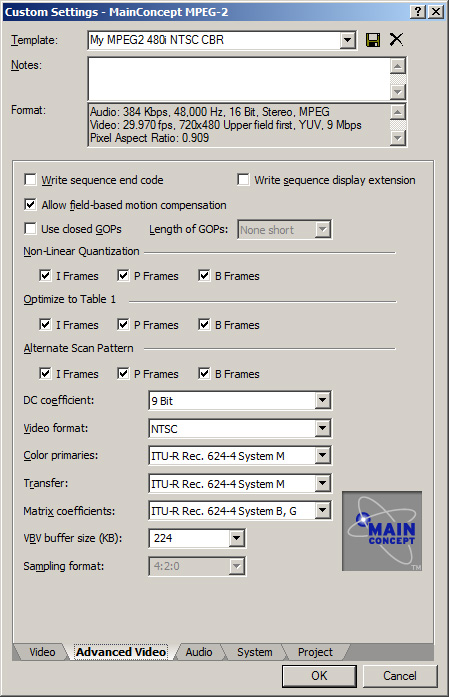
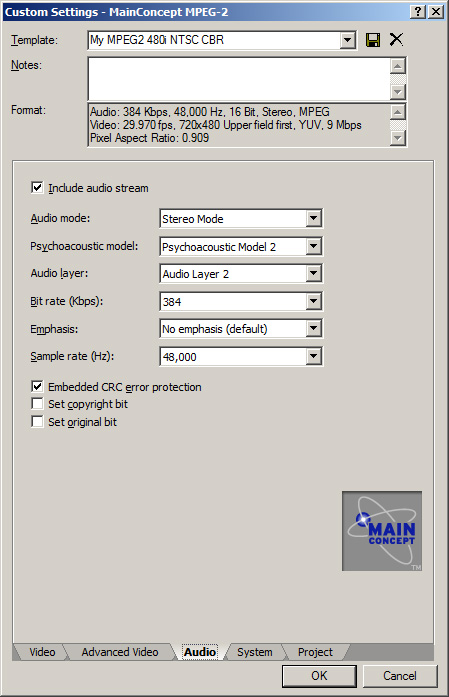
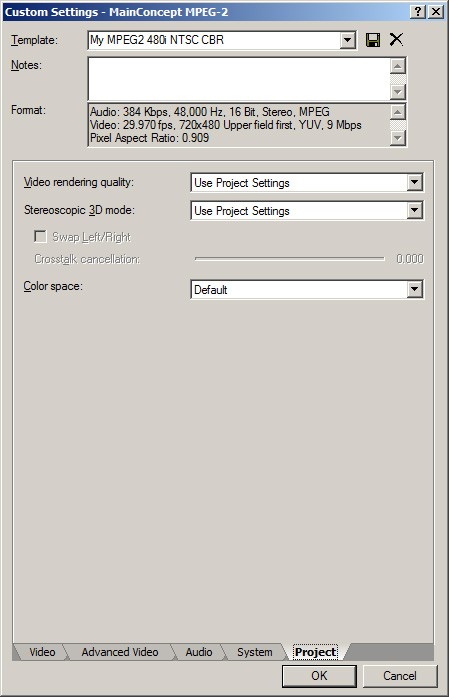
Give it the name “My MPEG2 480i NTSC CBR” and modify all settings according to the next five images below:
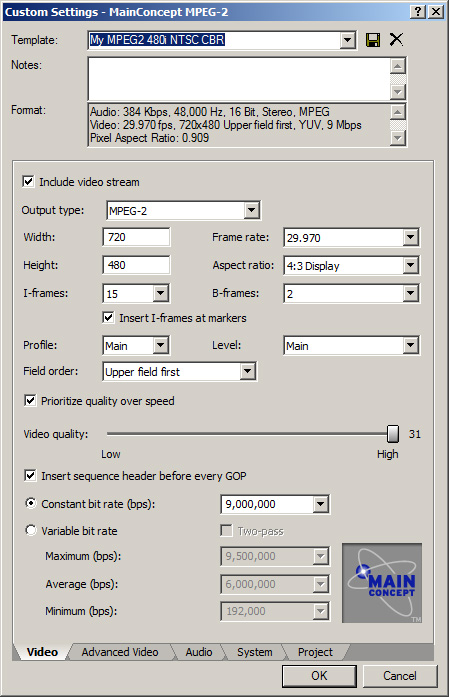
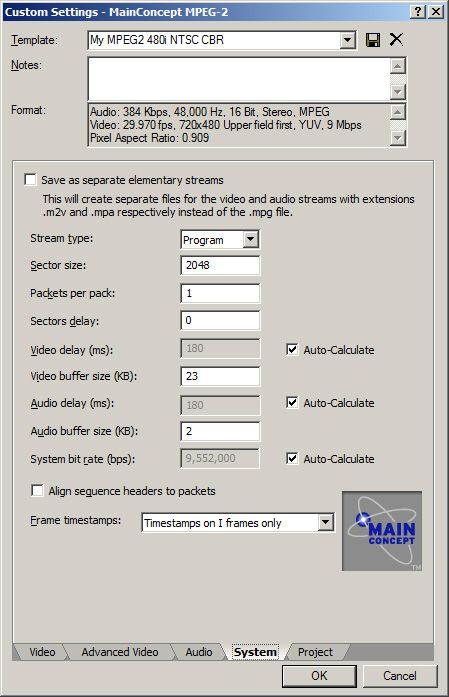
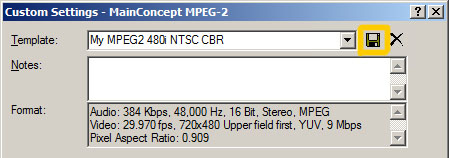
Click on the save (floppy disk) icon to save the template. “My MPEG2 480i NTSC CBR” will now be available along with all other templates under “MainConcept MPEG-2”
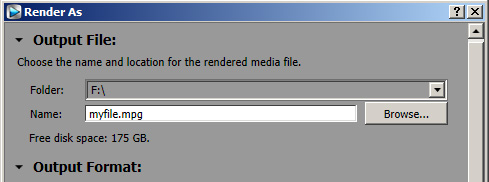
Rendering the file
Enter a file name:
Select your customized template created above. Notice that the equal sign (“=”) appears next to the selected template, indicating that this template’s settings match the sequence settings. You may also choose to “star” this template so that it’s easier to locate next time you need it.
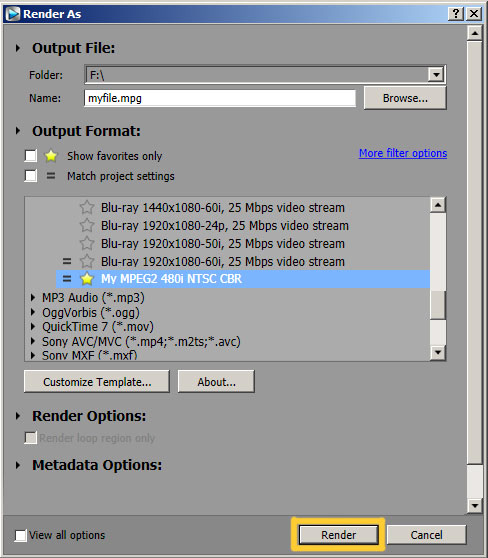
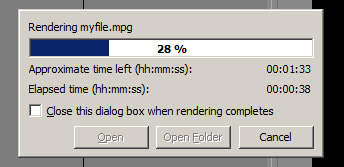
Click on “Render” and wait for the output file to finish rendering. This file can now be sent to the broadcaster.
Final Remarks
Are there exceptions to this tutorial?
Absolutely.
This tutorial covered generating 480i (720×480) outputs. If your source file is 720×512, you probably want to edit it on a 512i sequence and export it as a 512i MPEG-2 file (especially if the source contains closed captions). Likewise, if your source file is 720×486, you probably want to edit it on a 486i sequence and export it as a 486i MPEG-2 file.